Tableau is a tool that helps people to visualize and understand data quickly. You can use it to create worksheets, reports, and customized dashboards, and it offers performance monitoring to optimize their usage. It can be used in a desktop app or online in the cloud.
PostgreSQL, also known as Postgres, is a powerful open-source, relational database management system used as a primary data store for many software applications. It is highly stable, supports many advanced data types, and offers efficient performance optimization.
For example, Postgres can be used as a data source for pulling data into Tableau.
In this article, you’ll learn how Tableau works and how you can pull in data from PostgreSQL to the Tableau app. You’ll also learn about the potential challenges of connecting these tools to work together, as well as a possible alternative for managing your data needs.
Let's get started.
Create the Postgres database
The data set you’ll be using is called dvdrental, and it’s hosted on the official PostgreSQL site. As the name implies, this data set is a DVD rental database.
You’ll use this small DB to create a simple PostgreSQL database, then load and visualize it in Tableau.
- You can download the sample database here.
- You can install Postgres here if you don’t already have it.
Now, lets create the database:
First, launch the psql tool by running:
psql
Then, create the database in your Postgres server:
CREATE DATABASE dvdrental;
Finally, load the dvdrental.tar folder you downloaded into the new database:
pg_restore -U <POSTGRES USER> -d dvdrental <PATH_TO_DOWNLOADED_FOLDER>/dvdrental
You should now have the sample database fully loaded.
Manually transfer data to Tableau
Before you can transfer this data to Tableau, you need to connect it with Postgres by setting up the database as a data source.
To connect a database as a data source, Tableau requires some details, including the server’s URL, the database name, authentication type, and authentication details.
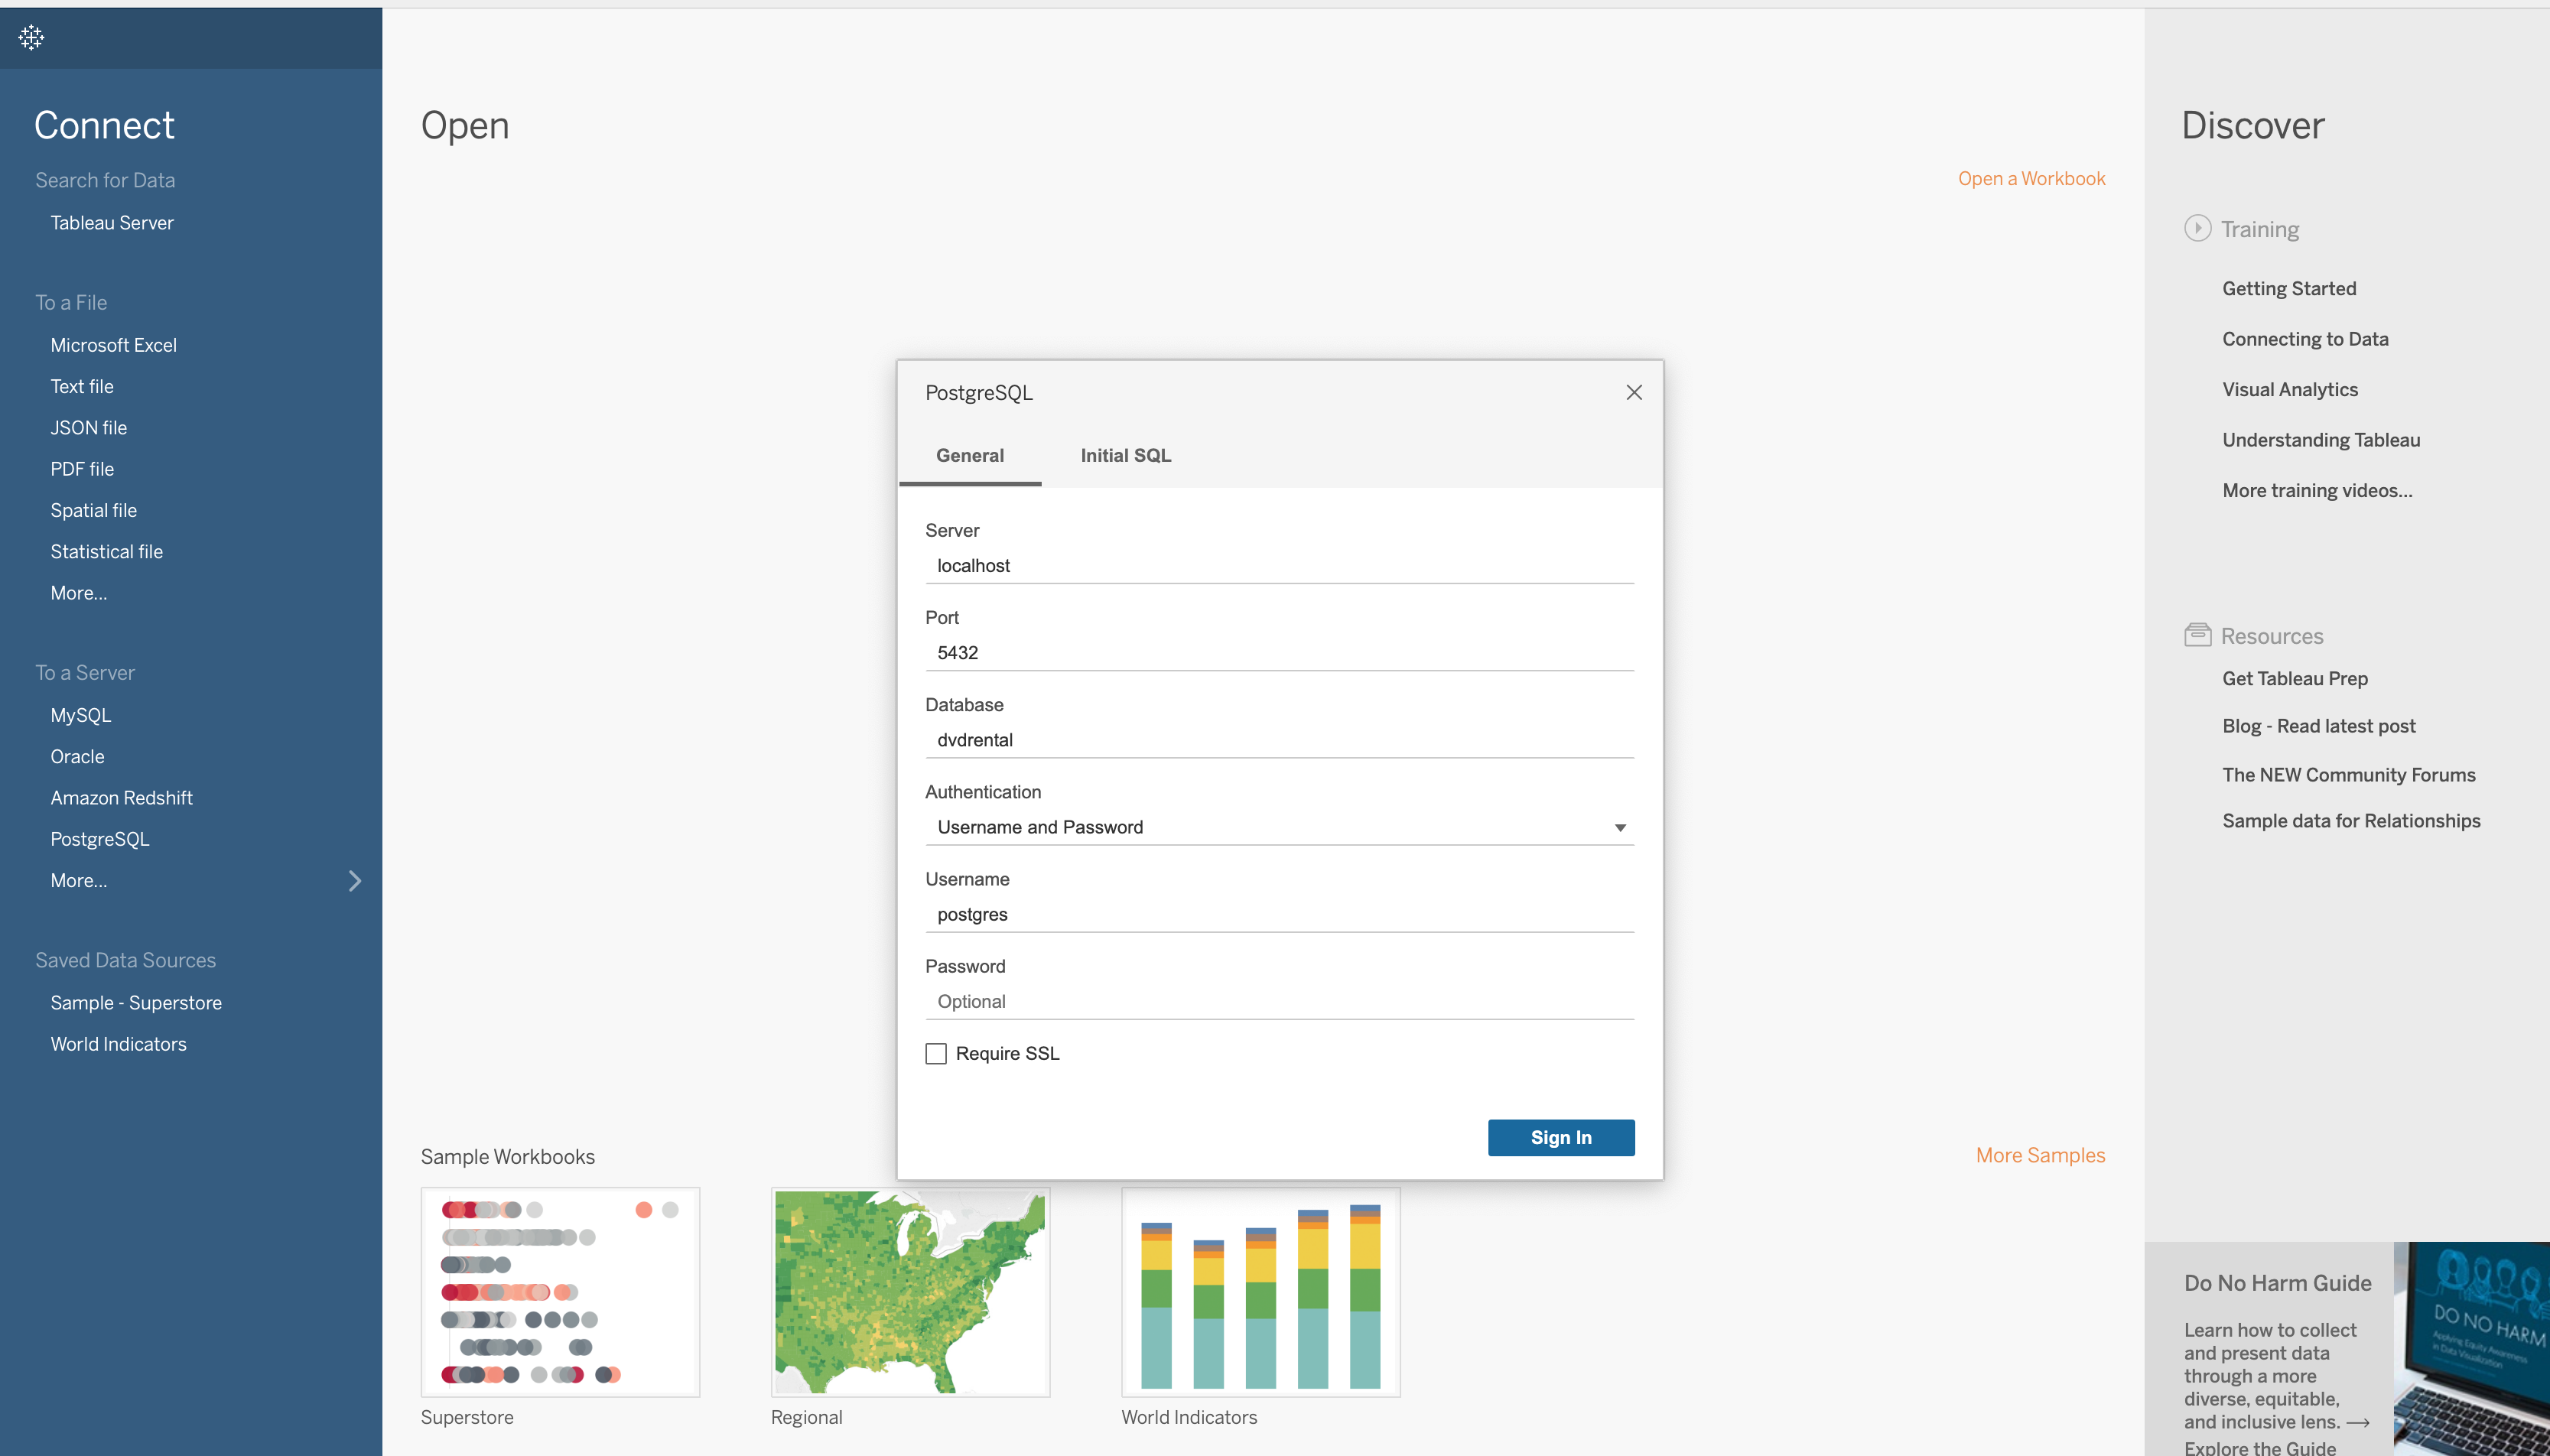
Tableau connection box
Open the Tableau app and input your connection details into the connection box (as seen above).
For this tutorial, the server name will be "localhost," and the database name is "dvdrental."
The authentication type is "Username and Password."
Once you fill that out, enter your Postgres username in the username box and leave the password box empty. Then click the Sign In button.
There should now be a connection to the database.
You should be able to see all the tables in the database, such as actor, city, film, etc.
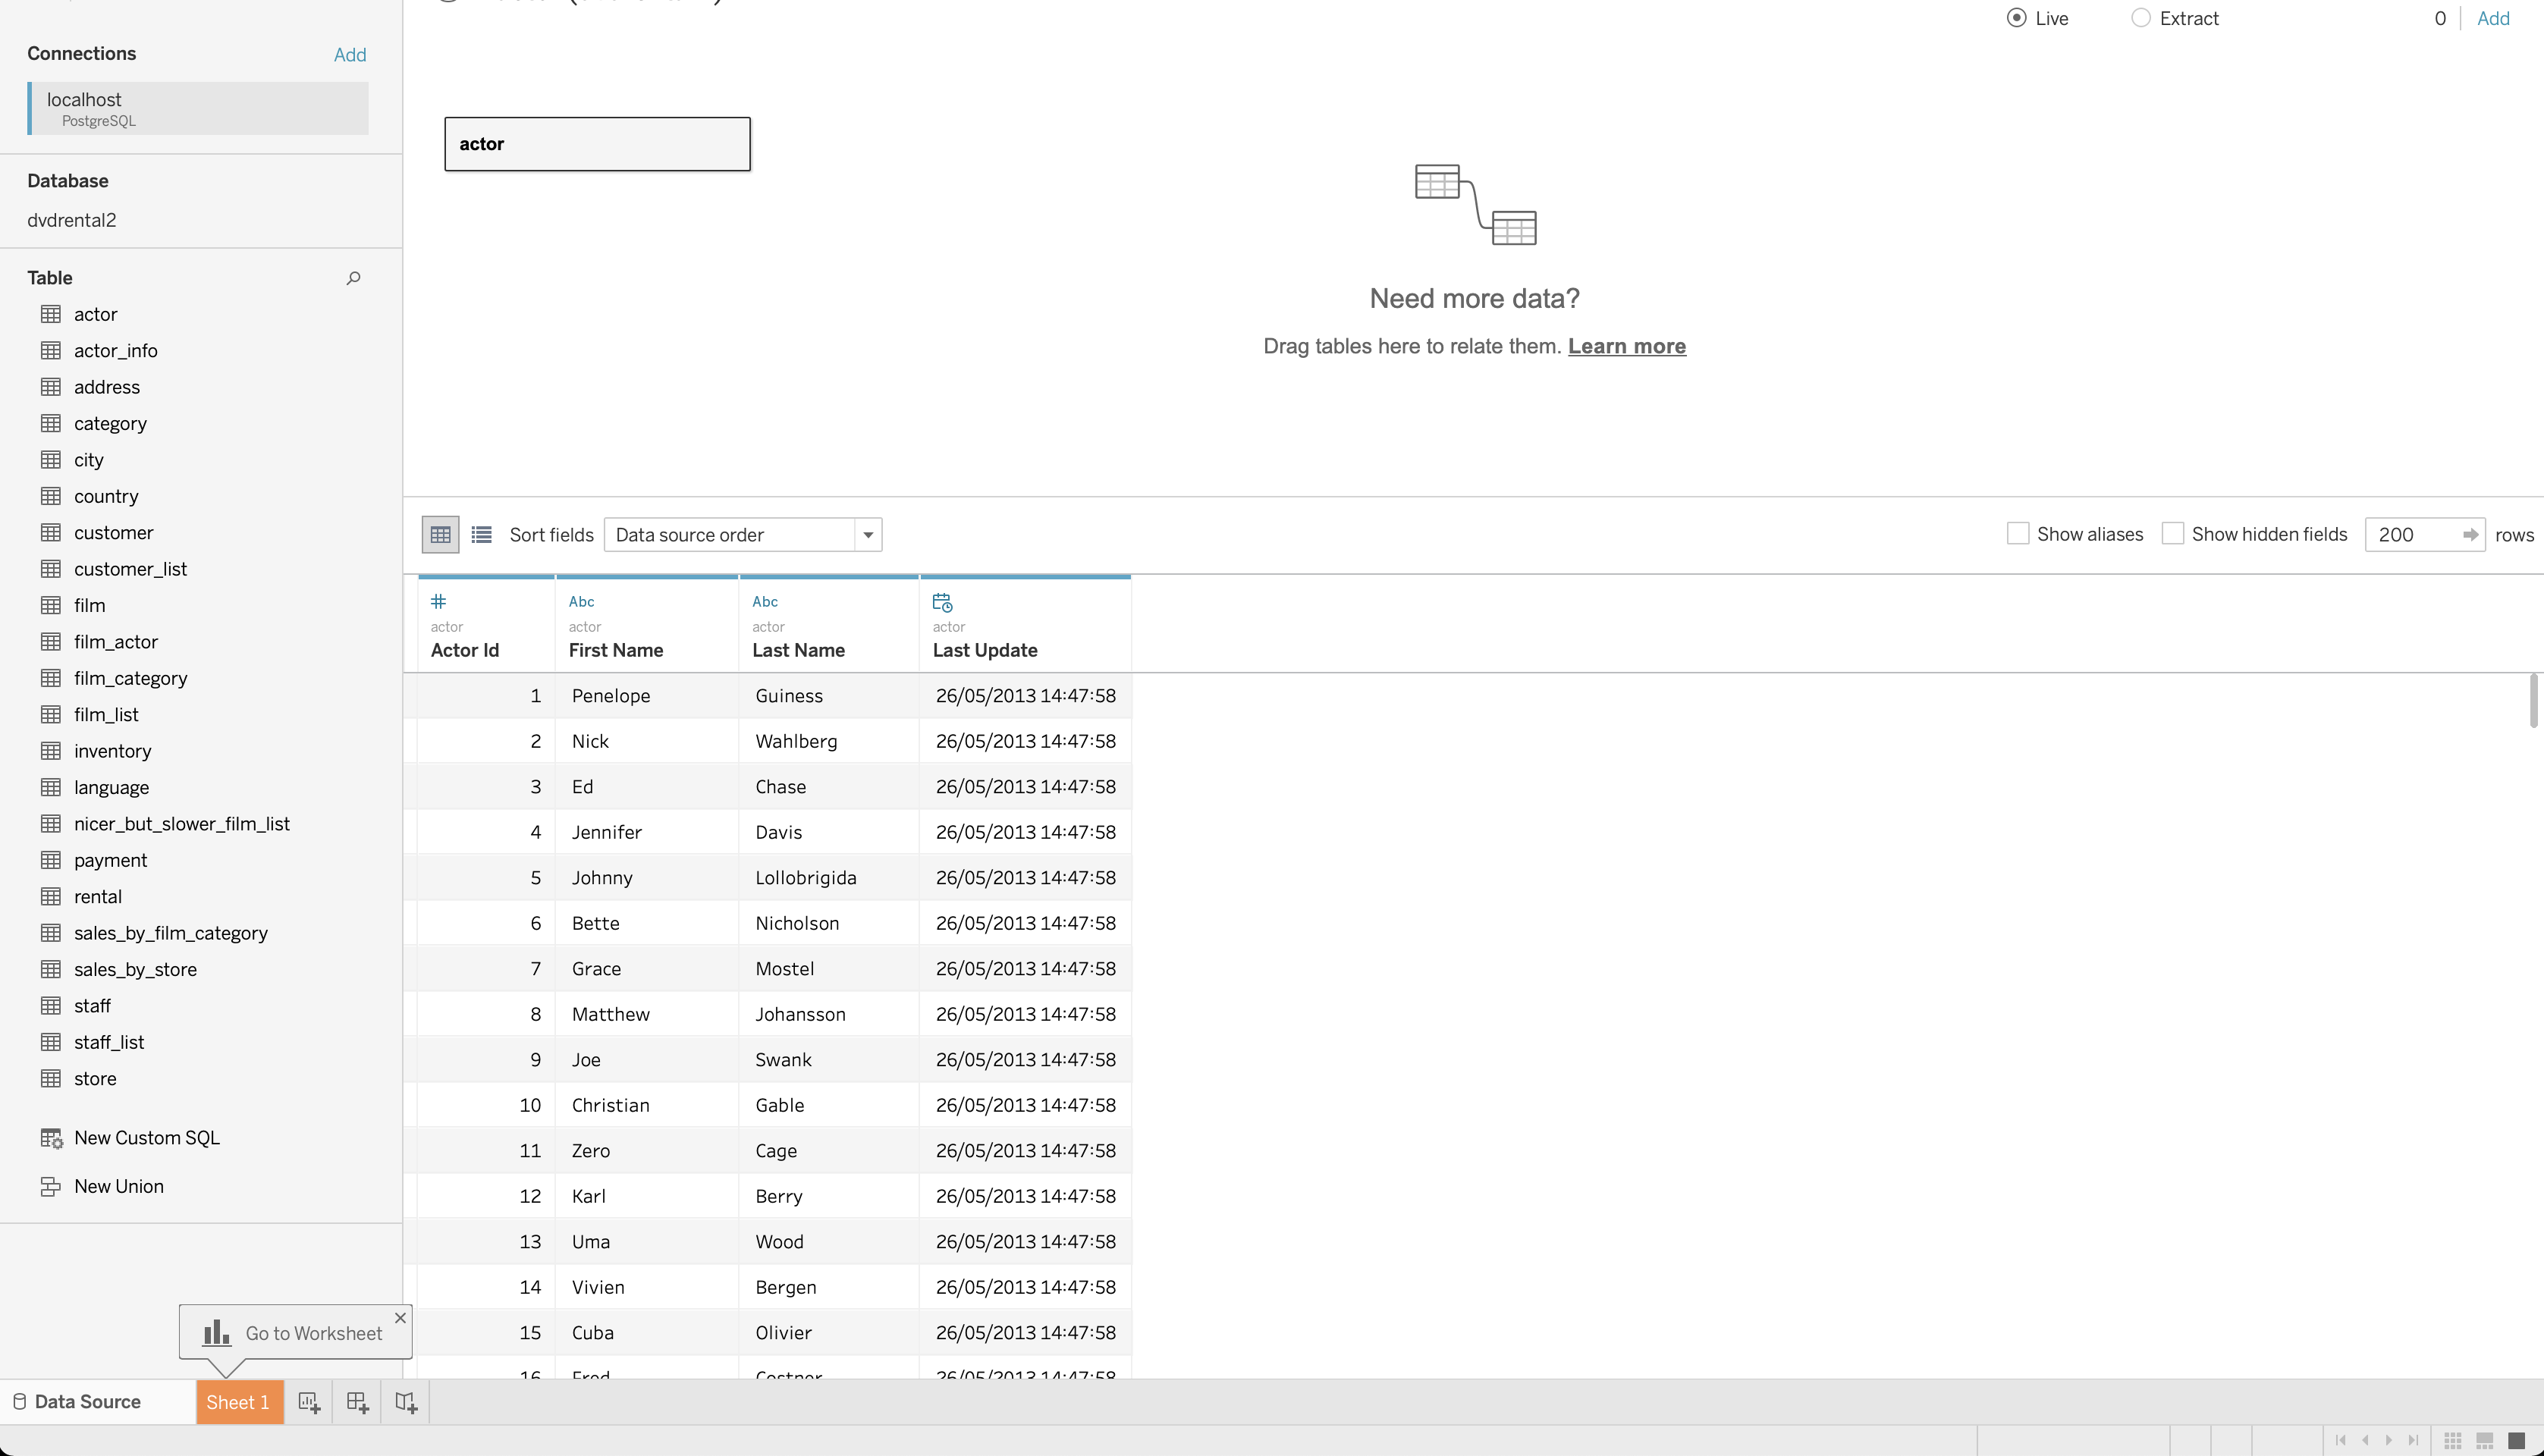
DB table connected
- Under Table, select a table (actor) and drag it to the center of the canvas, where it says "Drag tables here."
- Then click Update Now. This should show you the content of the table you have just selected.
You can now start using Tableau with the data you have imported.
- Click on Sheet 1 at the bottom left corner of the app. On the sidebar is the list of columns in the actor table.
- Right-click on the column First Name and select Create > Calculated Field.
- Rename the calculation Full Name and add in the value as
[First Name] + " " + [Last Name].
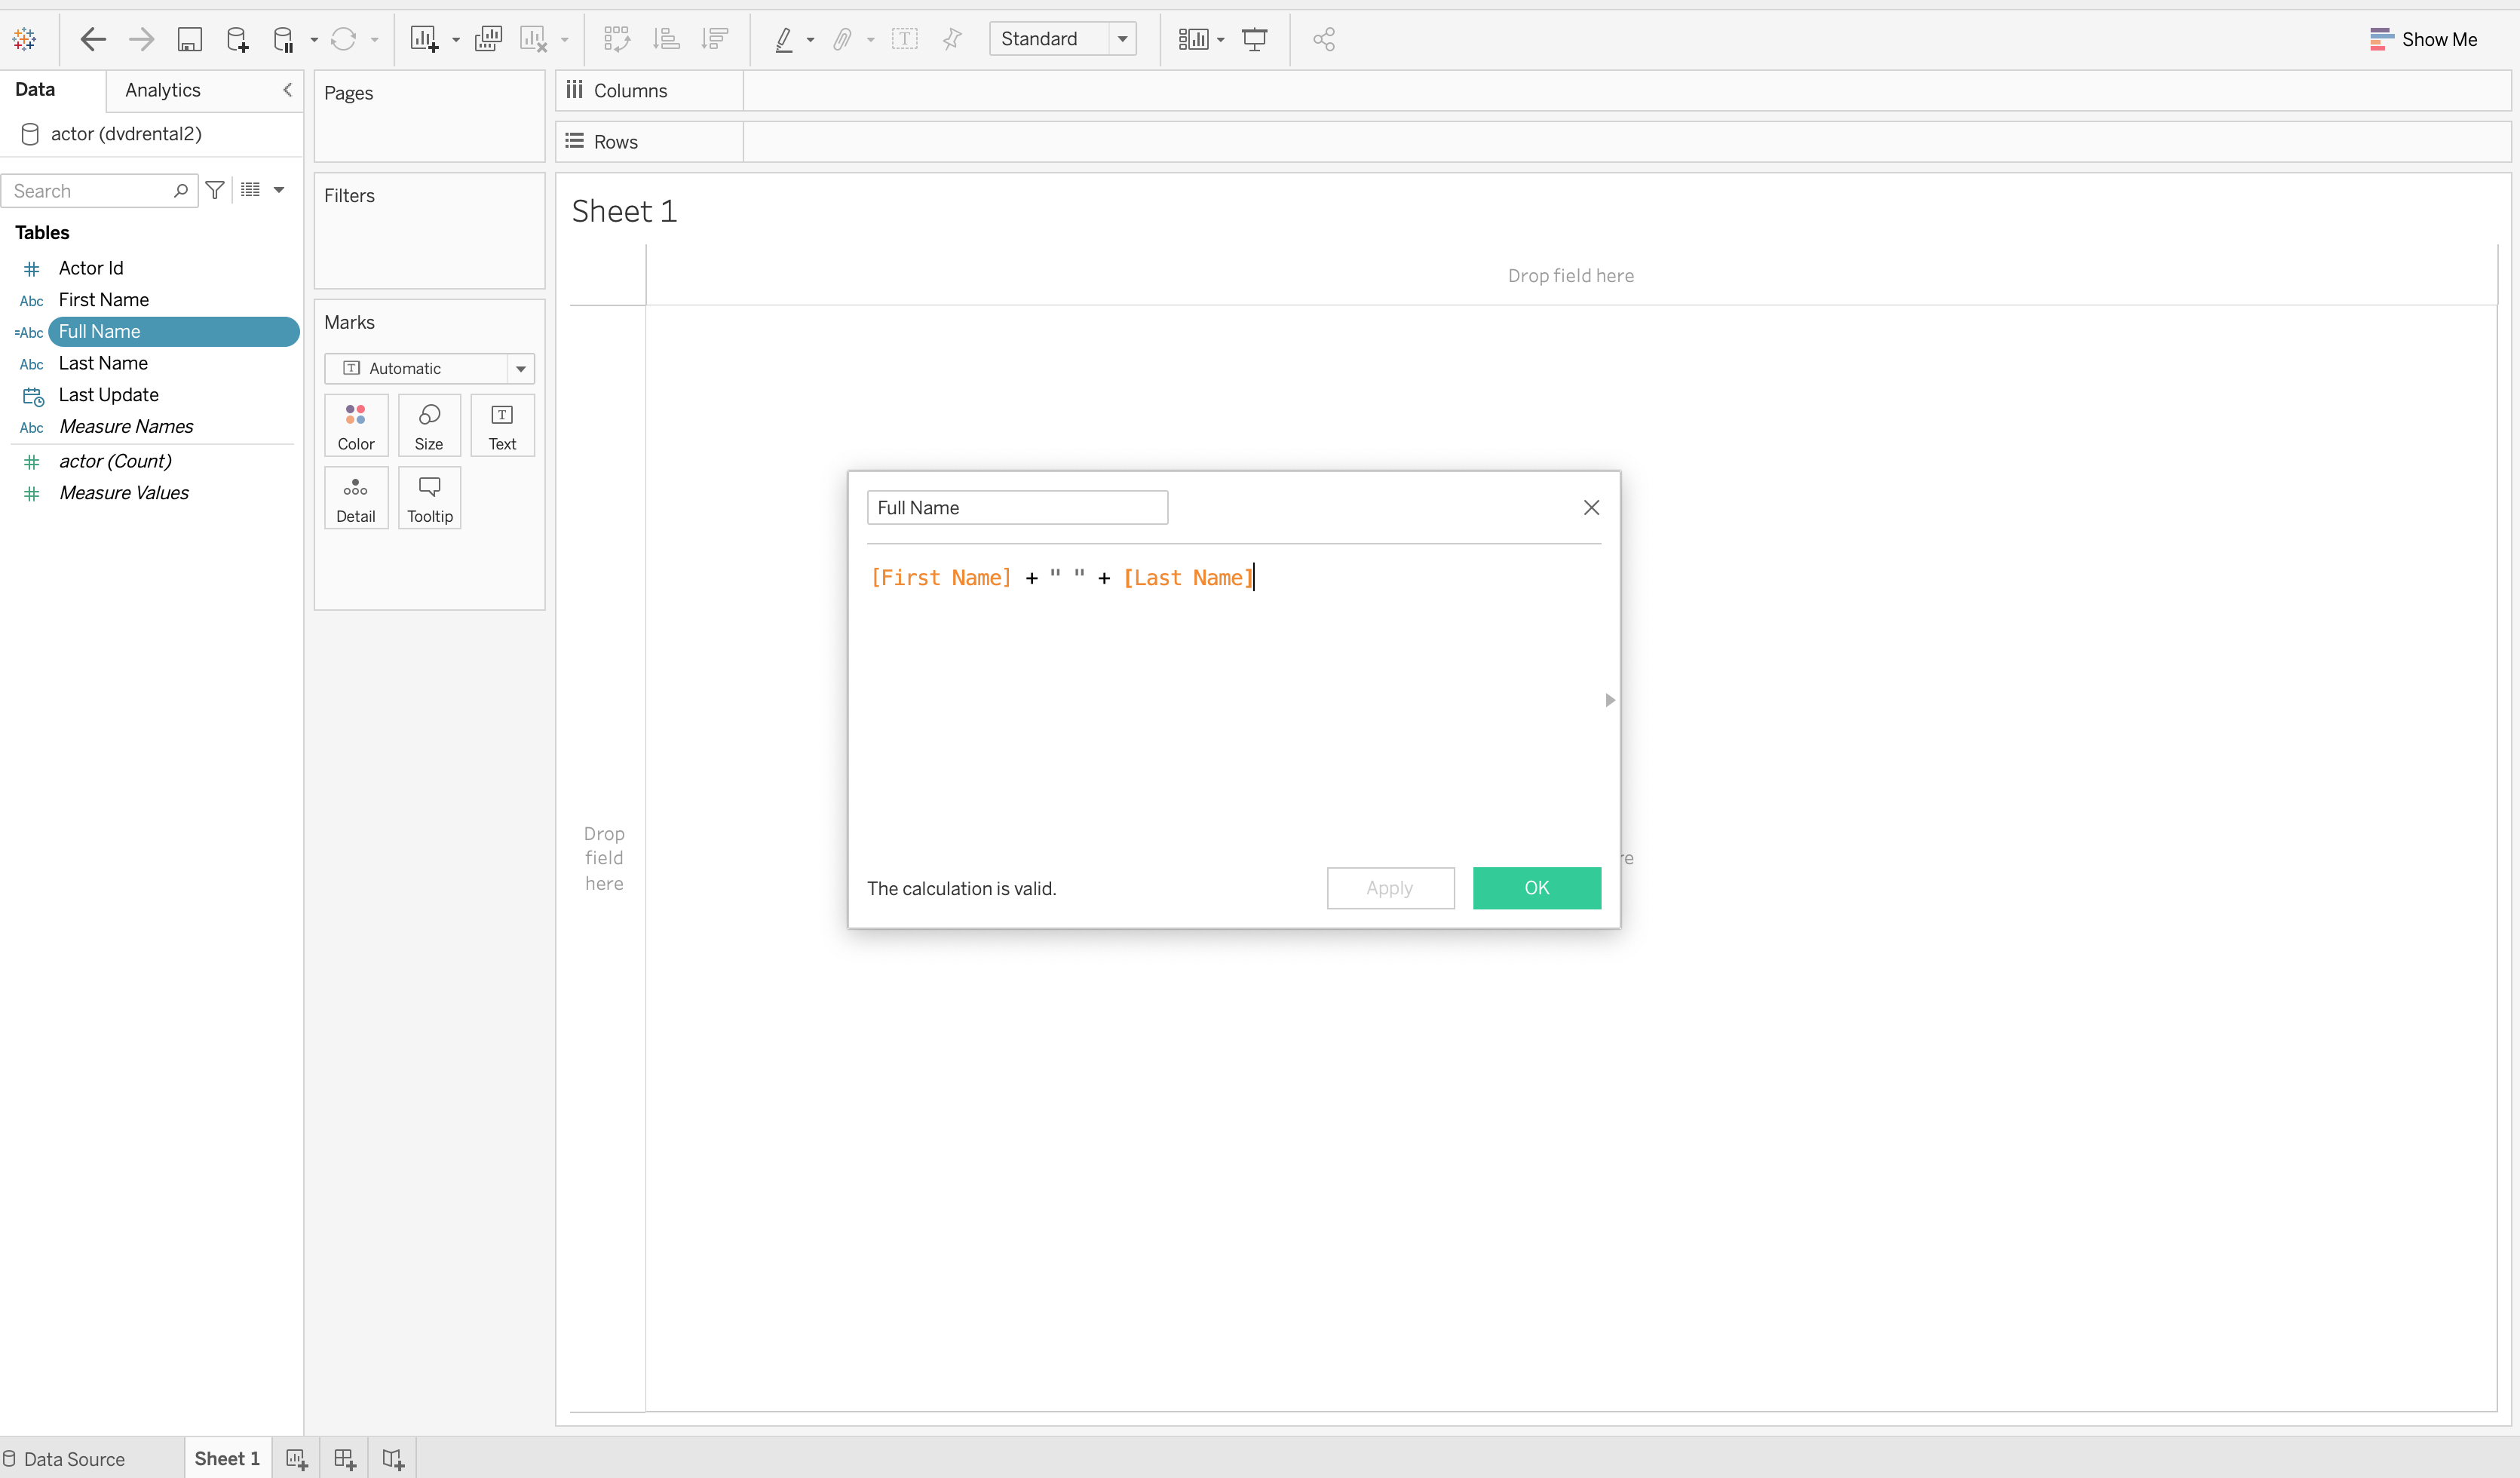
Calculate field, full name
Drag the fields First Name, Last Name, Full Name to the Rows shelf at the top of the page. You should see a simple worksheet containing rows of the actors’ names.
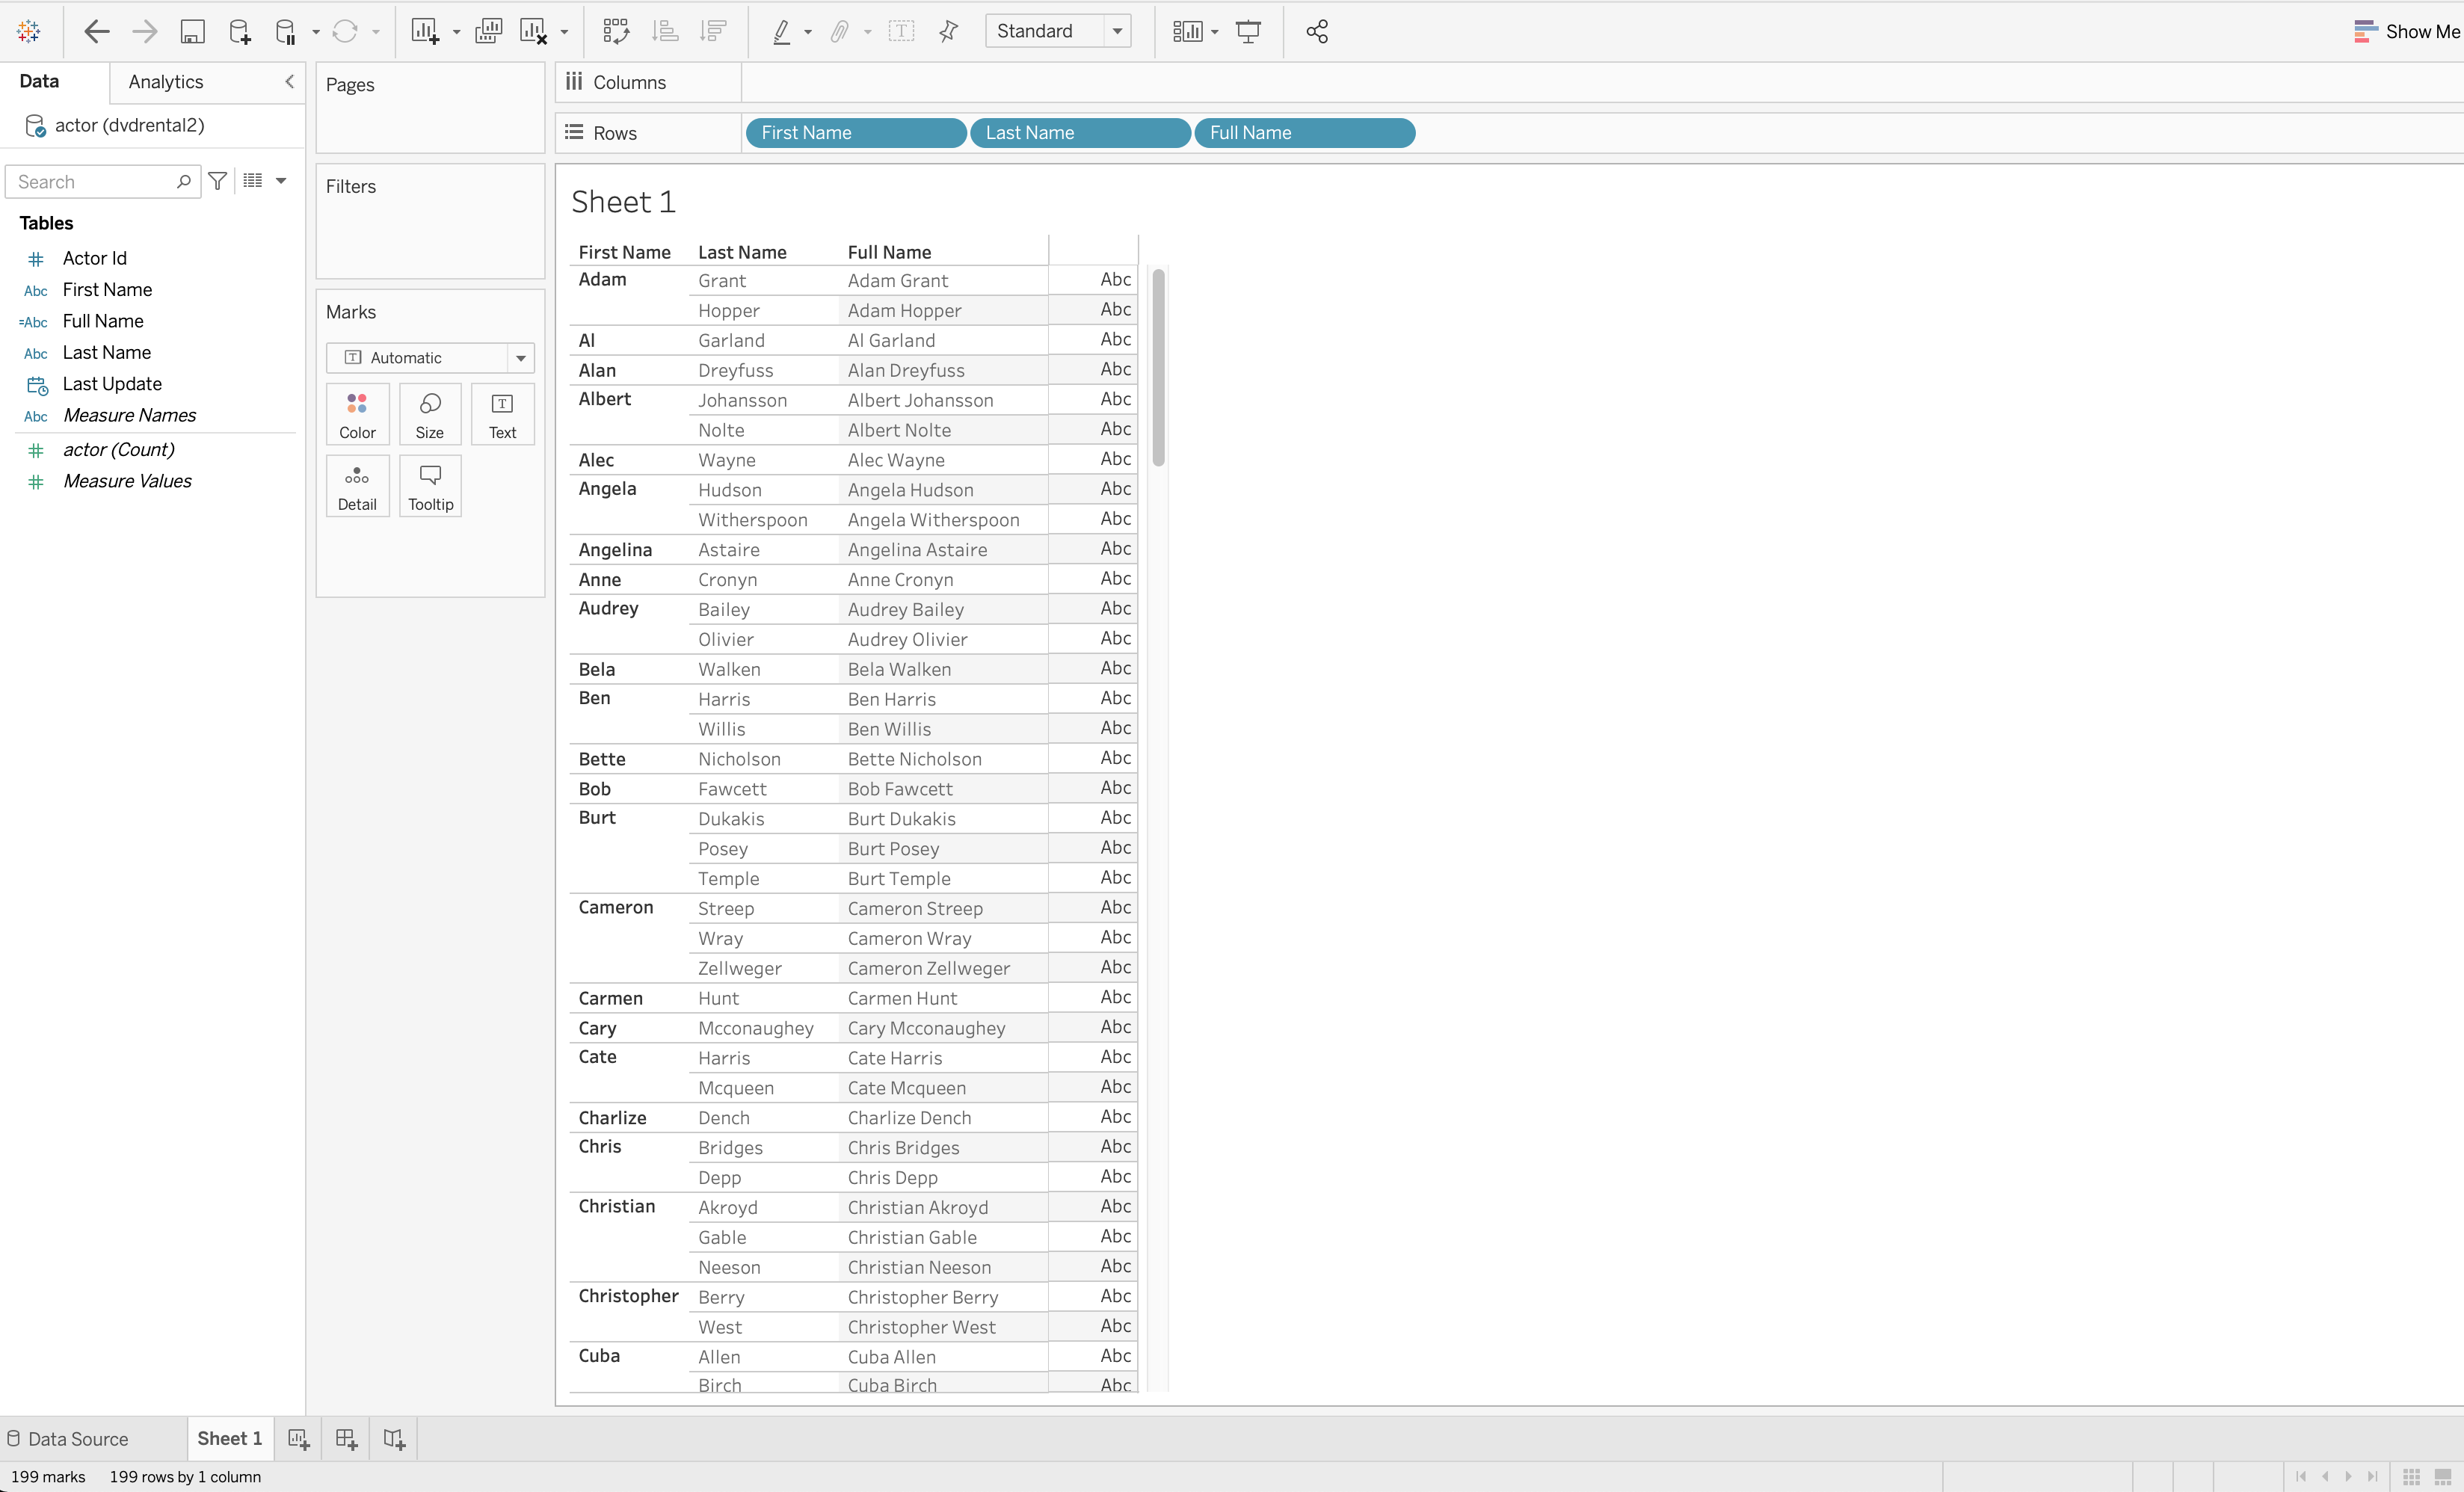
Filled Tableau worksheet
Connecting the dvdrental database to Tableau in this way seems straightforward. But in the real world, you're likely working with different data sources.
For instance, to build a report, you might need to pull in data from a MySQL database, Google Analytics, Salesforce, and BigQuery.
However, suppose you need to blend all that data together for analysis. In that case, you will find it difficult because Tableau doesn't provide an easy way to pull data from different sources simultaneously.
That's where a tool like Panoply comes in handy!
Transfer data using Panoply
With data spread across different tools, databases, files, and applications, doing your data analysis can be complicated and time-consuming.
Panoply is a cloud-based data warehouse that prepares your data for immediate analysis. It works by automatically adding data from any tool, app, database, or file, making it the ultimate source of all your data.
This automated process can, in turn, be used to build reports or dashboards in a tool like Tableau.
Panoply instantly sorts and models data for immediate querying, analysis, and connecting, then allows you quick access to this updated data.
Sign up for Panoply and then add a data source like Postgres to get up and running.
Connecting a data source to Panoply
This section will show you how to connect the dvdrental database to Panoply.
One thing to note, Panoply requires a hosted database, which means you’ll need to move the database to a hosted source.
Setting up Postgres and Heroku
To host a Postgres database, you can use Heroku (here's some more info on how to create a Postgres database app on Heroku).
Once you have Heroku and Postgres set up, you can find the database credentials by selecting Resources in your Heroku app.
- Click on the Heroku Postgres add-on, which takes you to a new page.
- Next, click on the Settings tab to view your database credentials.
- Then, follow this guide on how to import the dvdrental database into your Heroku database app.
You should now have a hosted dvdrental database with database connection credentials.
Working in Panoply
Next, log into your Panoply platform.
Once you log in to the Panoply platform, click the Data Sources tab on the menu, then click the Add Data Source button. On this page, there’s an abundance of data sources for you to choose from, like Shopify, Facebook, BigQuery, or Google Cloud Storage.
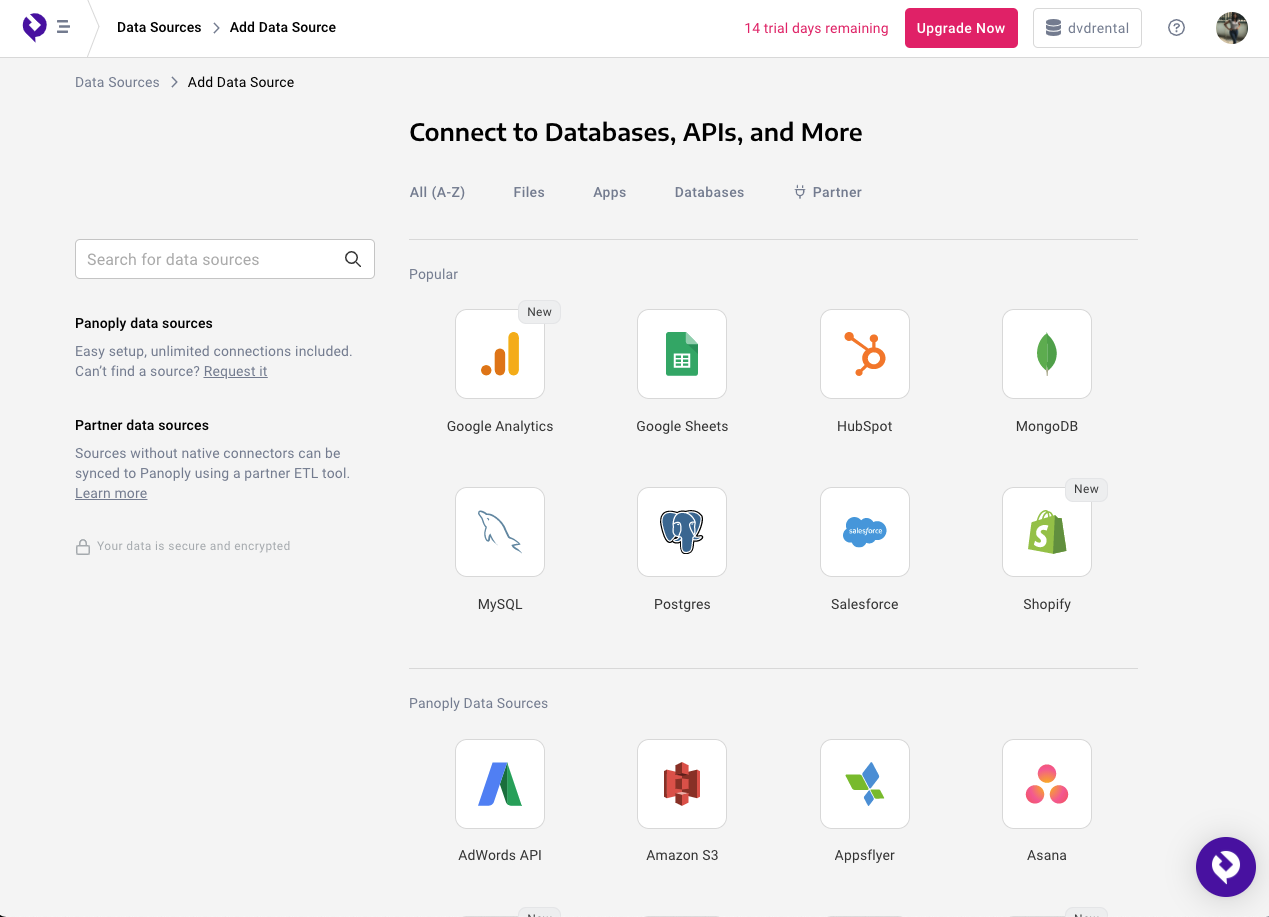
Data sources available on Panoply
For this tutorial, select Postgres. Once selected, you will be taken to the Data Source Settings page, where you have to connect to a hosted database.
In the form, enter the host URL for your hosted database, the port, the username, and the password.
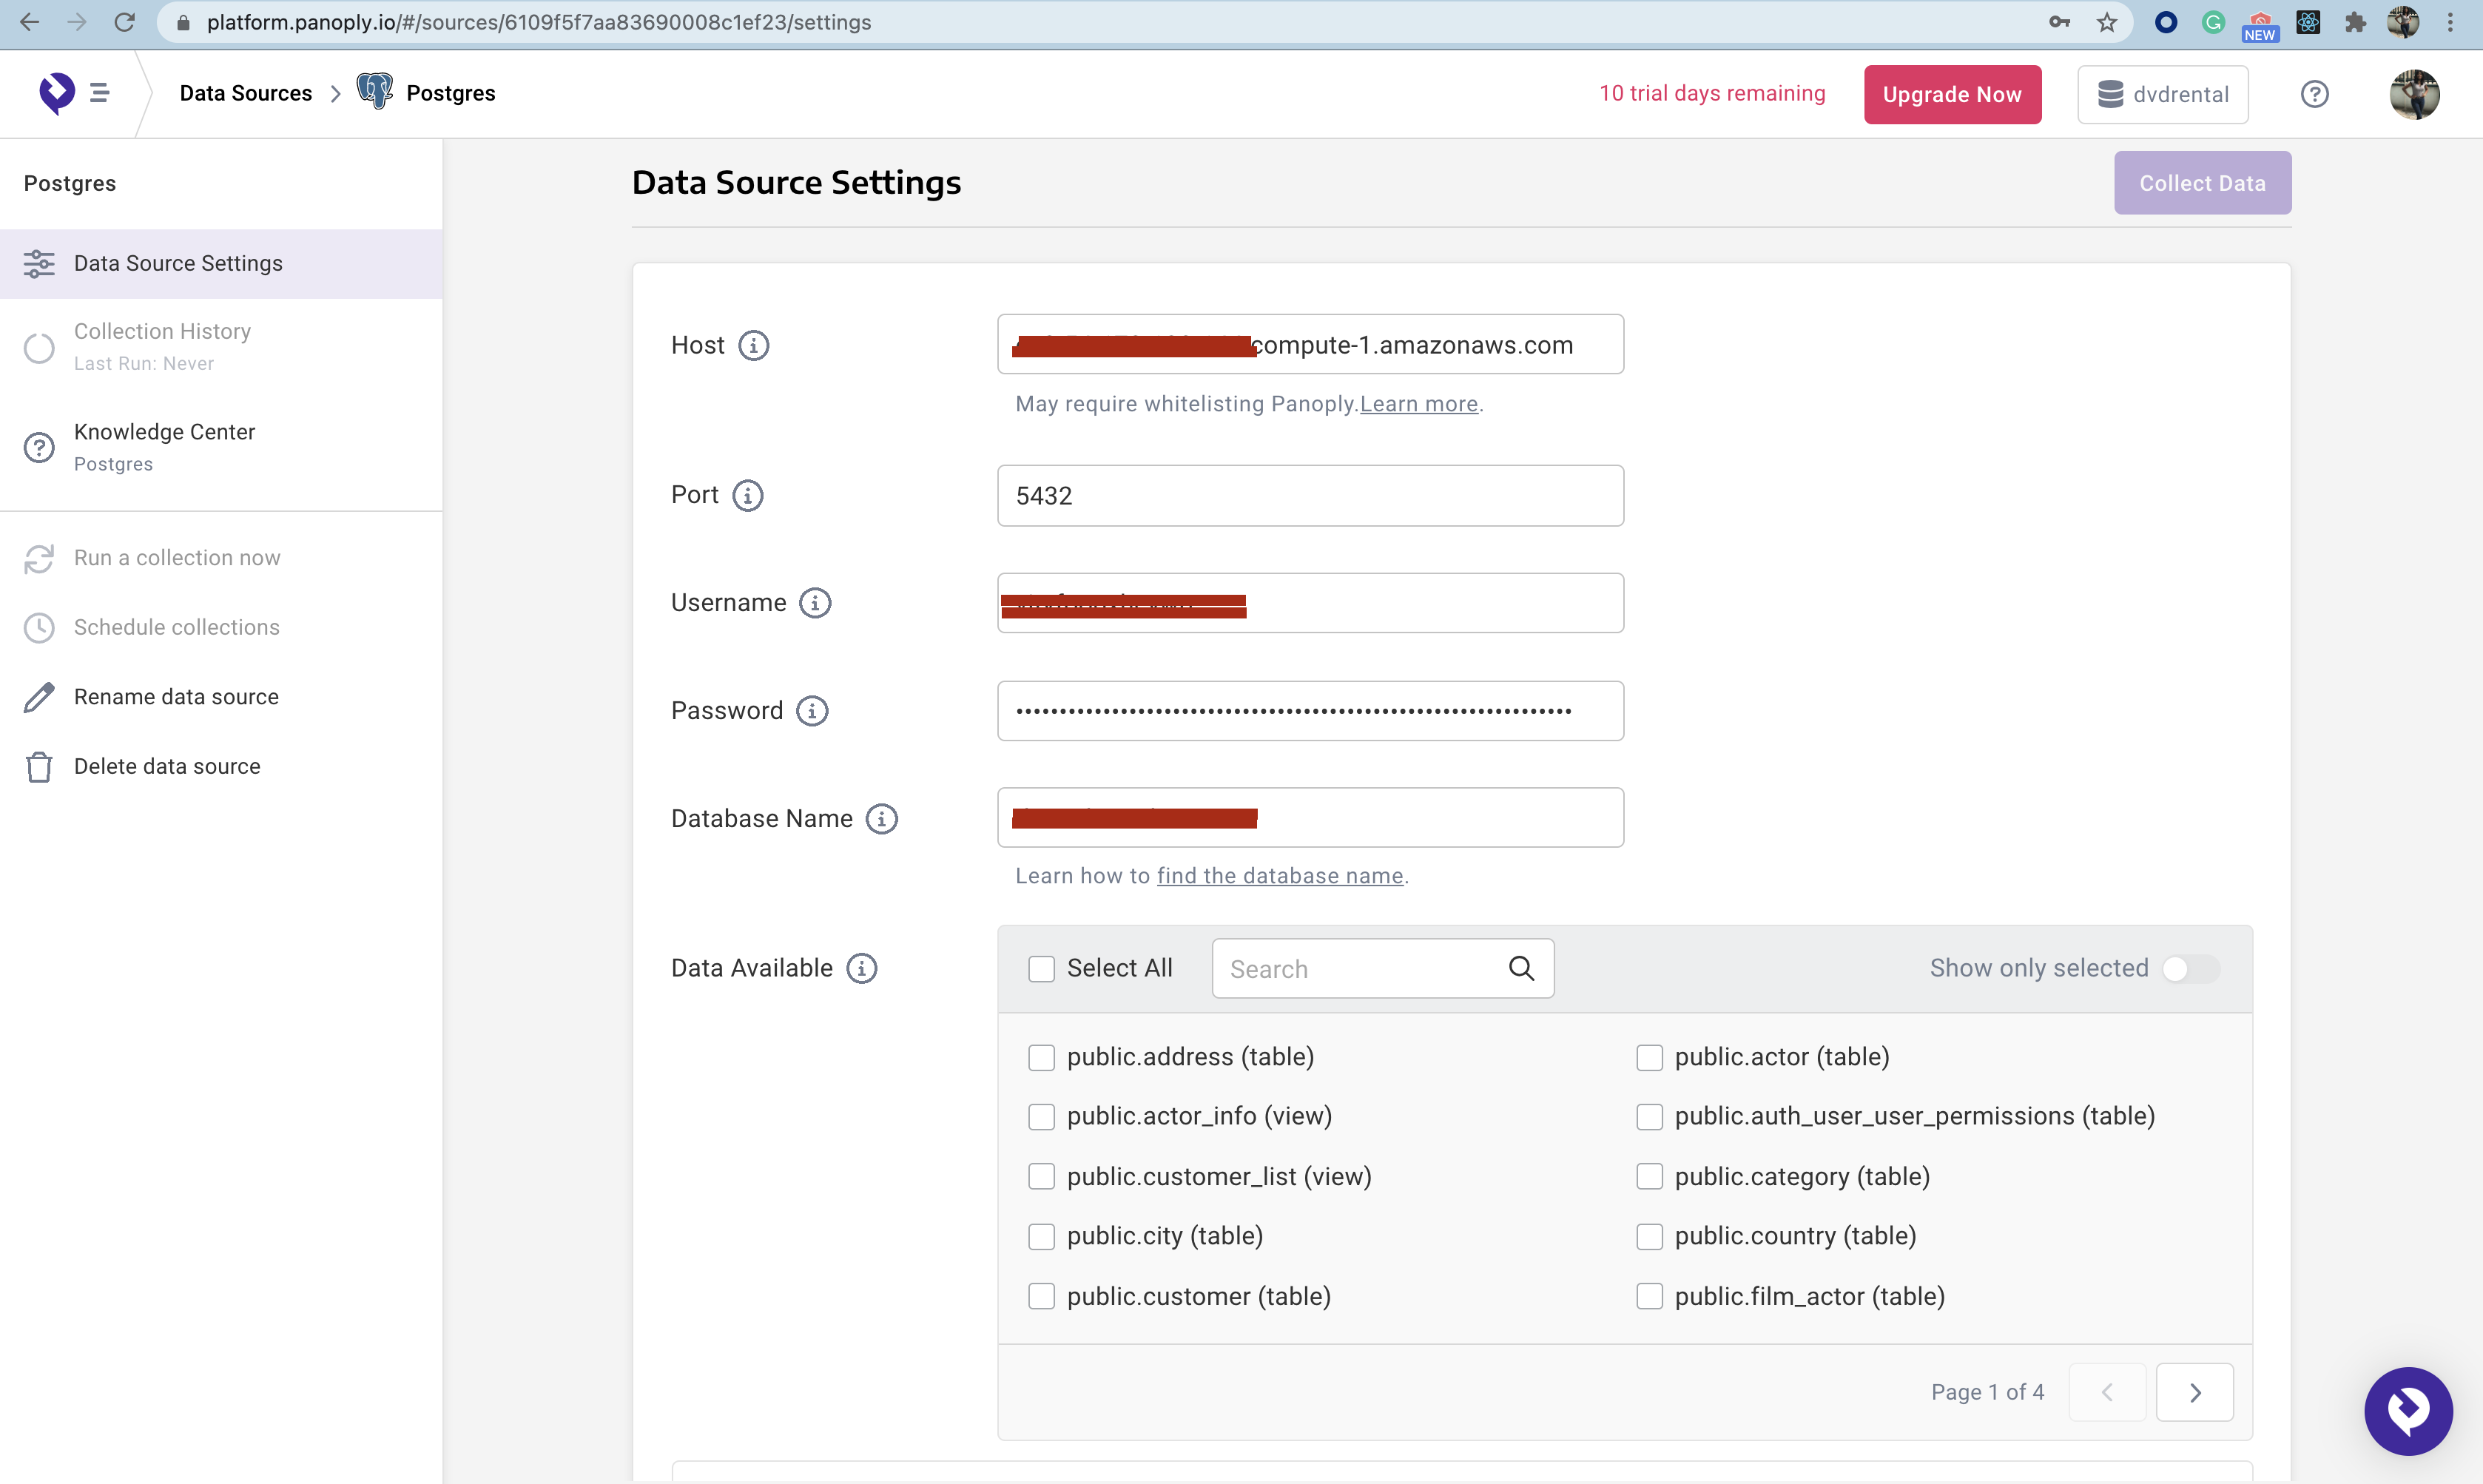
Connection for Postgres on Panoply
Once you connect to your hosted database, the list of tables becomes visible in the Data Available section.
- First, select the tables you want to make available to Panoply.
- In this case, if you are trying to get a list of actors and the films they appeared in, select the tables film, film_actor, film.
- Next, click Save Changes, then Collect Data to import the data into Panoply from your data source.
Once Panoply is done collecting data, you can see the data by clicking the Tables tab.
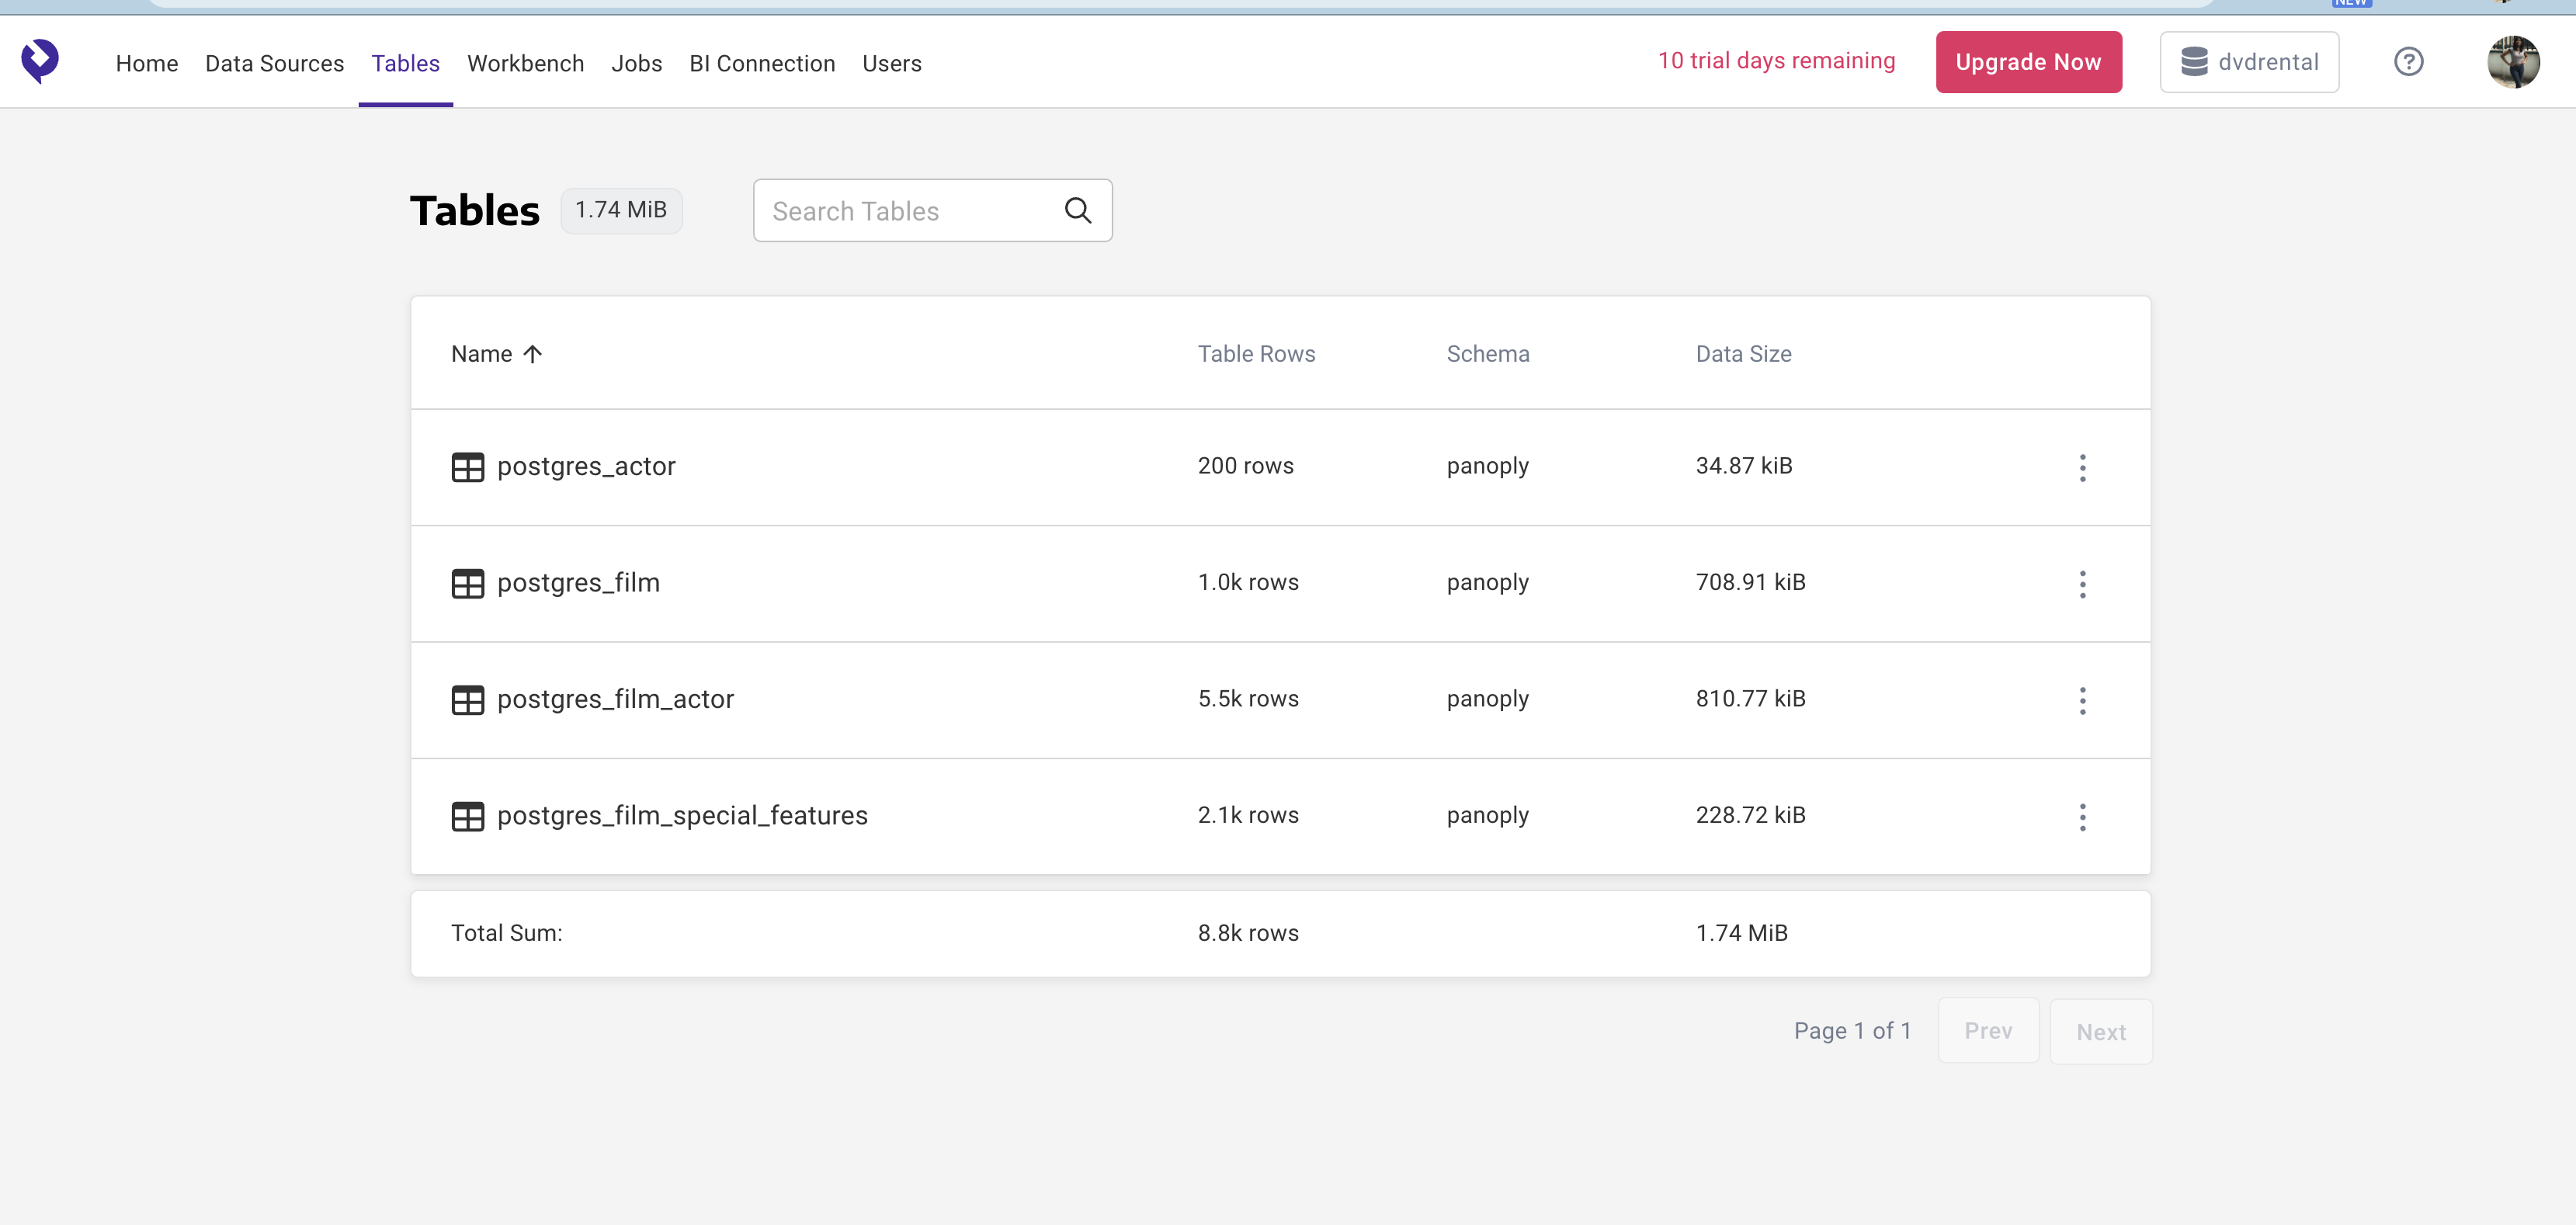
Imported tables in Panoply
After setting up your data in Panoply, connecting it to your Tableau app is a simple step.
On the Panoply dashboard, click the BI Connection tab on the menu.
In the section Connect Tools, you should see the details that you can use to connect to your Panoply data from most BI/workbench tools like Tableau, Sequel Pro, or TablePlus.
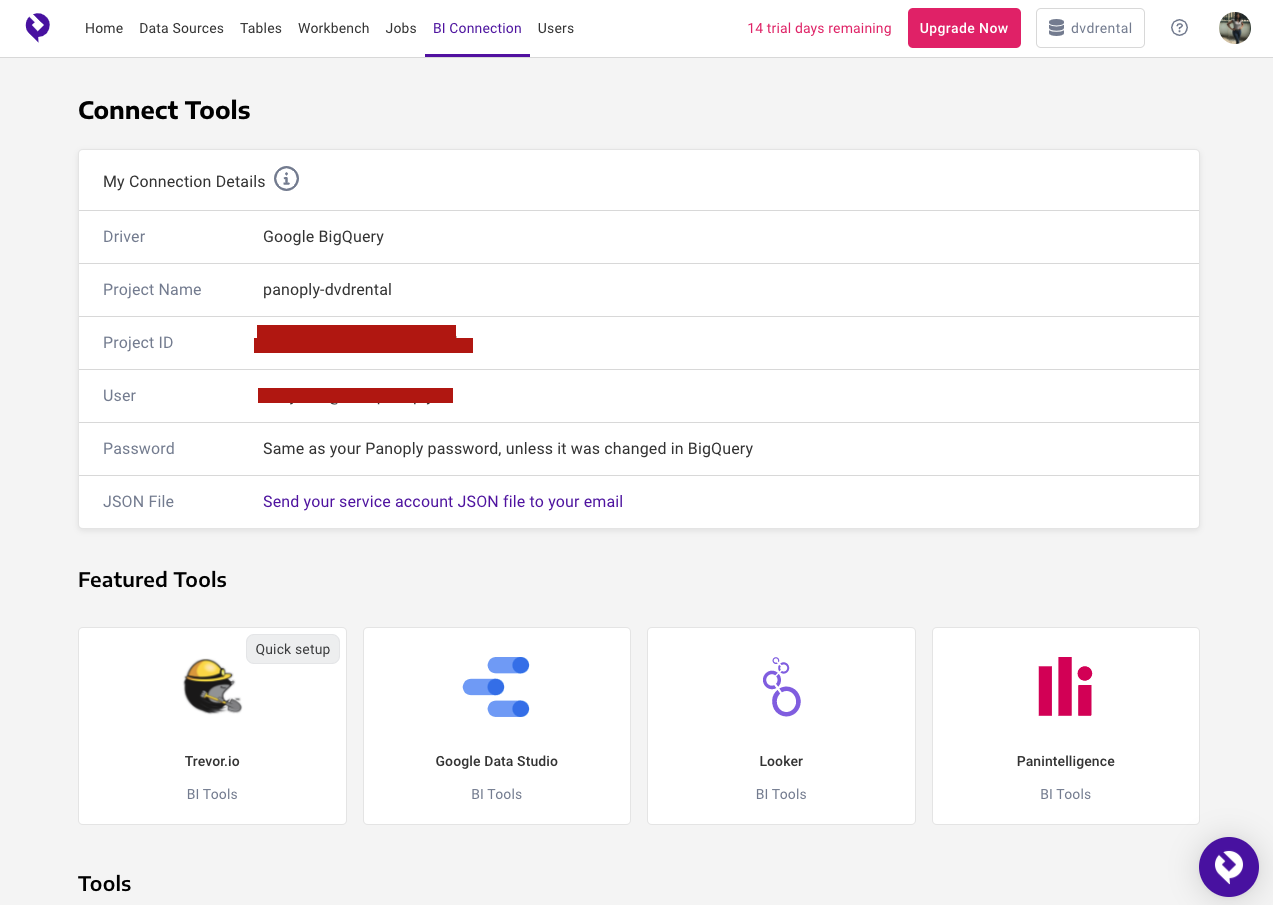
Connection details
Now, open Tableau and connect a data source.
This time, select Google BigQuery in Connect Tools. It will attempt to log you in to BigQuery in your browser tab.
- Select Use Another Account.
- Log in with the user found in the Connect Tools section in Panoply.
Once logged in, you should see your Panoply data inside Tableau. You can now work in Tableau as usual with data pulled from Panoply.
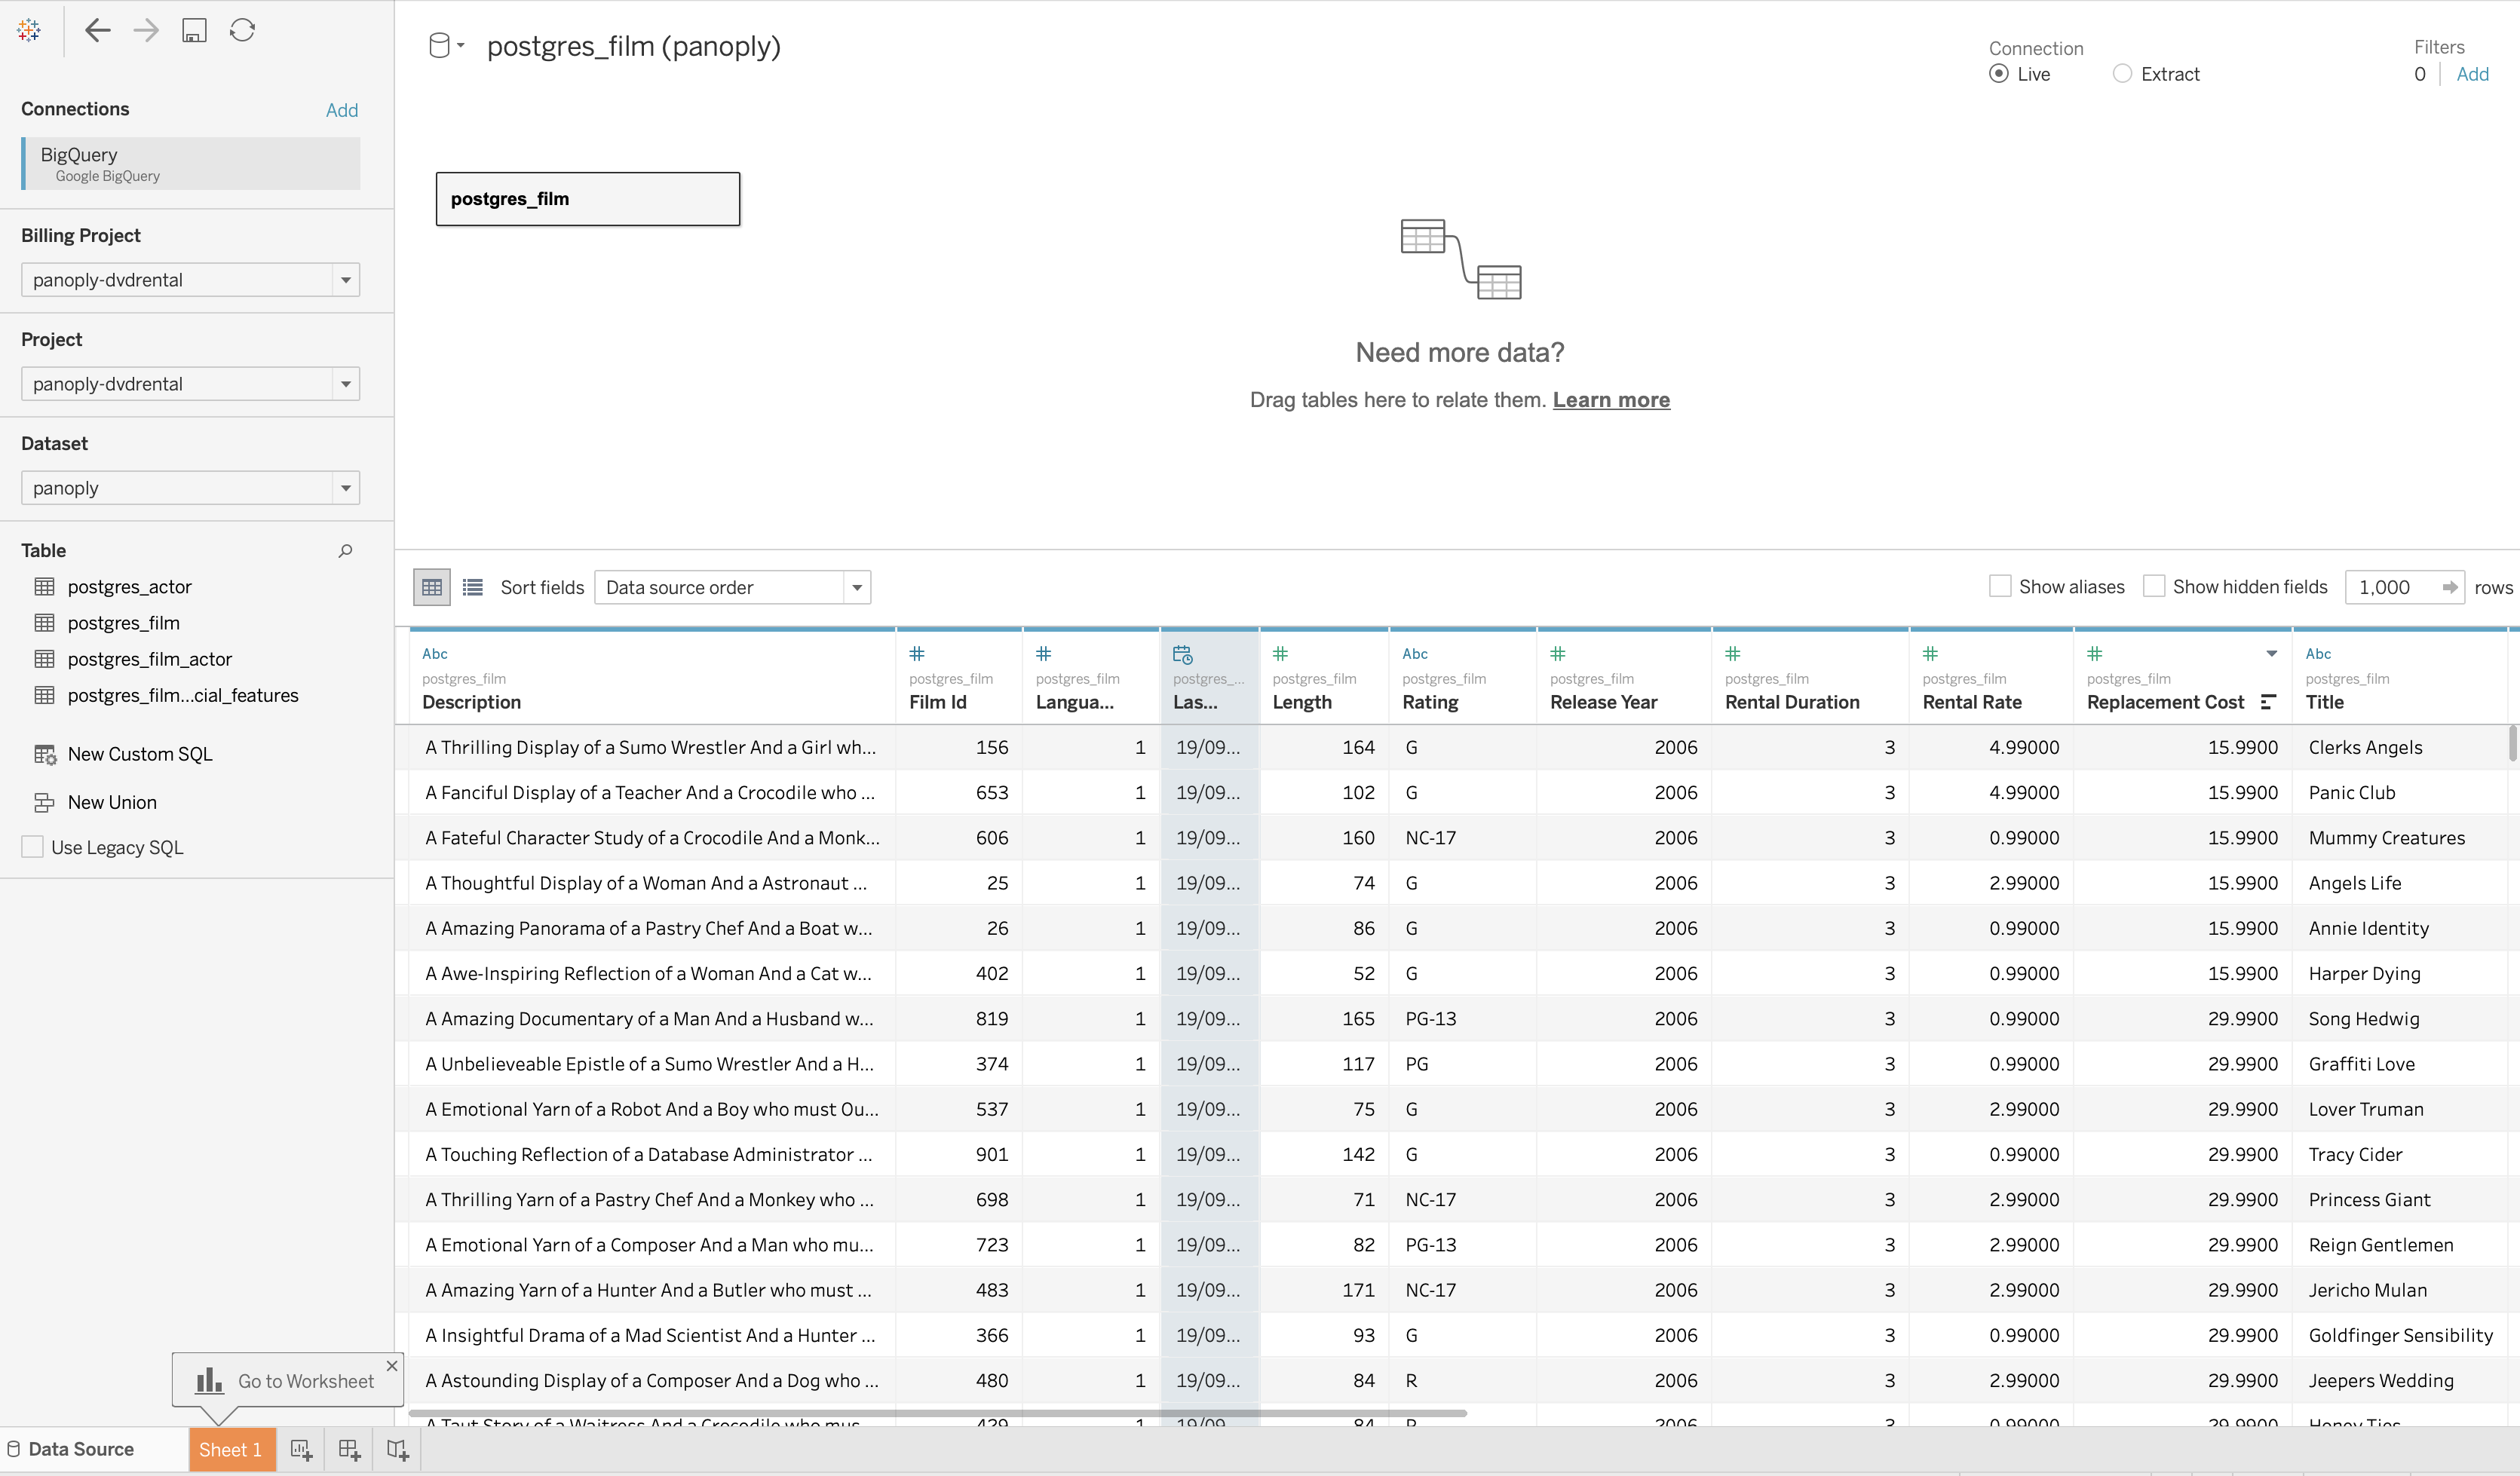
Panoply data in Tableau
Conclusion
This article introduced you to Tableau and how you can use it with a PostgreSQL database. You have also seen how to connect both tools to visualize your data more easily.
Though you can connect the tools manually, Panoply offers an easier way to use Tableau and PostgreSQL together by allowing you to pull your data alongside other data sources and data integration tools.
For more insights on using Panoply, you can try it for free.


